
In the world of industrial embroidery, precision, adaptability, and technical efficiency are paramount. As the demand for customized headwear production grows—fueled by streetwear fashion, sports merchandising, and promotional branding—so does the need for advanced machine control. Enter the Smart Stitch 1201, a single-head, 12-needle embroidery machine designed for professionals seeking scalable production capabilities. But for technicians, engineers, and even experienced embroiderers, the linchpin to successful operation isn’t just the machine—it’s the hat driver and its internal diagrams – smart stitch 1201 hat driver diagrams.
Smart Stitch 1201 hat driver diagrams are more than just blueprints or technical drawings. They are a visual language, communicating the machine’s operation, torque distribution, needle positioning, thread tensioning, and hoop movement. In this comprehensive article, we delve into the anatomy, evolution, and critical relevance of Smart Stitch 1201 hat driver diagrams, offering insights valuable to both seasoned technicians and informed buyers.
The Smart Stitch 1201 – Technical Foundation
Before dissecting diagrams, it’s essential to understand what makes the Smart Stitch 1201 a fixture in the embroidery landscape.
The Smart Stitch 1201 embroidery machine is a high-performance, industrial-grade unit equipped with:
- 12 Needles: Supporting up to 12 thread colors without rethreading.
- 360° Cap Rotation: Precision-oriented cap driver for full design freedom.
- User Interface: Integrated LCD panel with digitizing capabilities.
- USB & Wi-Fi Connectivity: For remote uploads and updates.
- Memory Storage: Large internal memory capable of storing thousands of patterns.
This machine’s appeal lies in its hybrid of affordability and sophistication. While compact enough for home studios, it holds its own in commercial production environments. But at the heart of its versatility lies its hat driver system—a specialized mechanism designed to adapt the flat-bed embroidery process to curved surfaces, particularly caps.
What Are Hat Driver Diagrams?
Hat driver diagrams refer to schematic representations showing how the hat driver assembly fits, interacts, and functions within the embroidery setup. These diagrams are crucial to:
- Installation and calibration.
- Troubleshooting alignment and tension issues.
- Understanding gear-driven vs. belt-driven models.
- Customizing for different cap types (e.g., structured vs. unstructured caps).
The diagrams may include exploded views of components, torque guides, spatial relationships between the needle bar and hoop, and drive shaft locations.
In essence, hat driver diagrams are part map, part manual, and part troubleshooting toolkit.
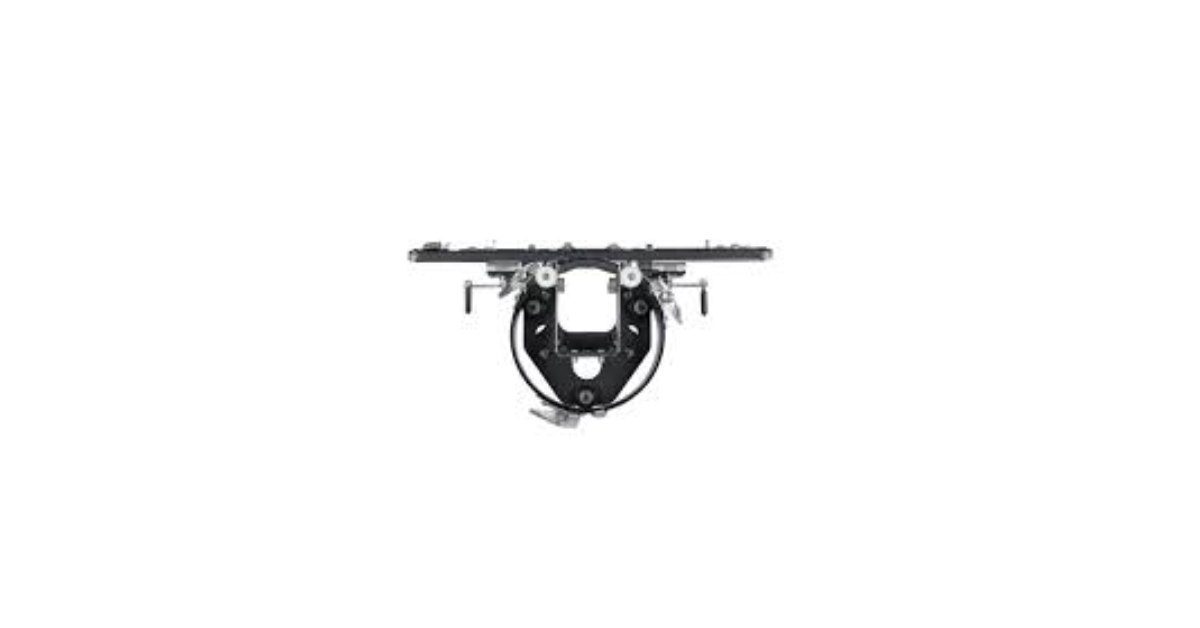
Anatomy of a Smart Stitch 1201 Hat Driver
Let’s break down the components typically shown in the Smart Stitch 1201 hat driver diagrams:
1. Rotary Cap Frame
- This is where the hat is hooped and secured.
- Diagrams often highlight the frame’s radius and tension points.
- Adjustable clamps are shown with tension indicators.
2. Drive Shaft Assembly
- Transfers motion from the machine motor to the hoop.
- Diagrams show bearing locations and lubrication points.
3. Timing Belt & Pulley System
- Not all Smart Stitch 1201 models use belts, but many diagrams indicate belt paths, tension levels, and tooth alignment.
4. Synchronized Feed Mechanism
- This system moves the hoop in both X and Y directions.
- Diagrams illustrate synchronization with needle penetration timing.
5. Cap Support Rail
- Prevents sagging or shifting of soft caps.
- Included in more advanced diagrams for dynamic stabilization reference.
Understanding how these parts fit and move together empowers users to perform maintenance, adjust for different cap styles, and troubleshoot quality issues without over-reliance on support technicians.
Why Diagrams Matter More Than Manuals
Technical manuals tend to be dense, text-heavy, and often lack specificity in real-time problem solving. Hat driver diagrams, on the other hand, offer:
- Instant Clarity: A single diagram can show what three pages of text attempt to describe.
- Component Familiarity: By seeing the exploded view, users begin to visualize the operational hierarchy of components.
- Time Savings: For commercial operators, downtime equals lost revenue. Diagrams expedite the repair process.
- Customization Insight: Diagrams can show how certain parts can be upgraded or swapped for enhanced performance.
Think of diagrams as the difference between reading sheet music and listening to the composition. One tells you what’s happening; the other lets you see how.
Updated Features in Recent Diagram Revisions
Since 2022, Smart Stitch has revised several aspects of its hat driver diagrams to reflect evolving user needs and mechanical improvements. Key updates include:
A. Modular Component Design
- Highlighting which components are now modular and easier to replace.
B. Dynamic Color Coding
- Enhanced diagrams now use color codes to indicate torque zones, friction points, and calibration areas.
C. Digital Integration
- Diagrams include QR codes linked to video walkthroughs and AR overlays—offering a new standard of visual guidance.
D. Wear & Tear Index
- New diagrams have predictive wear data overlays, suggesting replacement cycles based on run hours.
These updates reflect Smart Stitch’s pivot toward intelligent user interaction, moving beyond traditional maintenance manuals into an age of real-time, data-supported servicing.
Using Diagrams for Troubleshooting
The Smart Stitch 1201, while robust, is not immune to issues like misalignment, broken threads, or hoop slippage. Hat driver diagrams become indispensable when:
- Diagnosing Unusual Sounds: Pinpointing gear misalignment or bearing issues.
- Adjusting for Cap Height Variability: Realigning the feed mechanism to compensate for high-profile or low-profile caps.
- Correcting Stitch Distortion: Mapping out X-Y feed lag due to pulley misalignment.
- Dealing with Skipping Needles: Adjusting needle bar position using torque guidance zones.
By overlaying real-time data or even just visual checks with the diagram, users can root out issues before they compromise output quality.
Diagram Literacy – A Skill for the Future
Diagram literacy—the ability to interpret, analyze, and apply mechanical diagrams—is becoming as critical as machine operation itself. In an industry racing toward automation and AI-assisted machinery, understanding the logic behind your equipment is a skill that separates high-level operators from average technicians.
Smart Stitch 1201 hat driver diagrams encourage this literacy by:
- Offering transparent engineering.
- Fostering proactive maintenance.
- Building trust between machine and user.
Whether you’re a shop owner scaling production or an engineer customizing machines for niche products, knowing your diagrams is non-negotiable.
Common Misinterpretations and How to Avoid Them
Despite their value, hat driver diagrams can be misread. Here are frequent errors and how to correct them:
| Misstep | Explanation | Correction |
|---|---|---|
| Over-tightening components | Misreading torque zones | Refer to updated colored diagrams with PSI indicators |
| Installing frame off-axis | Misjudging rotational alignment | Use compass-grid diagrams with centerline marks |
| Skipping synchronization step | Overlooking timing belt cues | Follow step-by-step animated overlay from QR-linked diagram |
| Mislabeling part numbers | Using outdated diagrams | Always verify diagram revision date before referencing |
Awareness of these issues can prevent downtime and unnecessary damage.
Diagram Digitization – The Future of Smart Stitch Maintenance
In late 2024, Smart Stitch announced its initiative to integrate AI-driven diagnostics with digital diagram interpretation. This means:
- Real-time 3D rendering of your hat driver mechanism.
- Augmented reality overlays to guide part replacement.
- Predictive analytics for part failure based on usage patterns.
The Smart Stitch 1201 platform is slated to receive these upgrades via firmware updates by mid-2025, making the hat driver diagram not just a static reference, but a living, responsive support tool.
Conclusion: Why Smart Stitch 1201 Hat Driver Diagrams Deserve Attention
In a market where automation is growing and personalization is king, machines like the Smart Stitch 1201 are foundational. But the true value comes from understanding the systems that power them. Hat driver diagrams are the schematics of your machine’s soul—they detail how movement becomes creation, how steel and software translate into embroidered artistry.
If you’re operating a Smart Stitch 1201 without a working knowledge of these diagrams, you’re missing half the picture. Whether for troubleshooting, customization, or education, these visual tools are indispensable in maximizing the potential of your embroidery workflow.
Read: Antarvwsna: The Inner Impulse Driving Modern Consciousness
FAQs
1. What is the purpose of a hat driver diagram in the Smart Stitch 1201 machine?
The hat driver diagram serves as a detailed schematic that shows how the hat embroidery mechanism fits and functions within the Smart Stitch 1201. It illustrates the placement, connection, and movement of parts such as the rotary cap frame, drive shafts, pulleys, and tension systems. These diagrams are essential for installation, maintenance, calibration, and troubleshooting of the cap embroidery setup.
2. How do I know if I’m using the most updated hat driver diagram for my Smart Stitch 1201?
Always check the revision date on the diagram, usually listed in the lower margin or within the metadata of a digital file. Updated diagrams from 2023 onward often feature colored torque zones, part modularity tags, and QR codes for digital walkthroughs. If your diagram lacks these, it’s likely outdated. Smart Stitch periodically releases updates via firmware packages or downloadable resources from official sources.
3. Can I use the same hat driver settings for all types of caps?
No. Structured, unstructured, low-profile, and high-profile caps all require different tension levels and driver alignments. The hat driver diagram helps you adjust components such as the cap frame height, clamp pressure, and feed rail distance. Misusing a one-size-fits-all approach can result in misaligned stitches or fabric puckering.
4. What are common issues that the hat driver diagram helps solve?
The most frequent issues include:
- Cap slippage during stitching.
- Thread breakage caused by misaligned feed mechanisms.
- Uneven or distorted stitching from improper tension calibration.
- Excessive machine vibration due to loose drive shaft or pulley settings.
By referencing the diagram, users can quickly pinpoint and correct these mechanical faults.
5. Are Smart Stitch 1201 diagrams compatible with augmented reality (AR) apps or digital tools?
Yes, the latest diagram revisions are AR-compatible. Starting in late 2024, Smart Stitch began embedding QR codes in their diagrams, linking to 3D models and overlay tutorials. With a supported AR app or smart device, users can view an interactive version of the hat driver in real-time, overlaying guidance directly onto the machine during service or setup.